I'm Creating this more for just myself, to keep ideas and recipes where I will always know how and where to find them; no matter where I am...

I probably won't update very often or possibly even remember I have it after this next week, but I thought it was a good idea so I'm going with it for now.

Your welcome to look, comment and even join in if you would like. I just thought it would be fun if nothing else!

So lets enjoy!

If you want to be actively involved with this blog and share some of your fun ideas let me know. Email me at macijill@hotmail.com and I will add you to the list!

The more the merrier!

Sunday, December 26, 2010

Homemade 3 Musketeers Bars

IMG_9797 fresh color
Source: The Cottage Sisters

Homemade Three Musketeers
4        cups chocolate chips, divided
1        8 ounce tub frozen whipped topping, thawed
2        tablespoons vegetable oil

Line an 8 or 9-inch square pan with wax paper. 
In a medium bowl, melt 2 cups of chocolate chips in the microwave at fifty percent power, or use a double boiler.  Using an electric mixer on high speed, beat melted chocolate for about 30 seconds.  Add whipped topping to melted chocolate and beat until well combined and fluffy, 30-60 seconds more. 
Spread chocolate mixture evenly into prepared pan (if mixture is too stiff, press into pan with lightly dampened hands).
Place in freezer for 30 minutes.  Remove pan from freezer and turn chocolate mixture onto a cutting board; cut into one-inch squares. 
Return squares to freezer for another 15-20 minutes. 
Meanwhile, melt additional 2 cups chocolate chips with 2 tablespoons of vegetable oil and stir until well combined.  Dip frozen chocolate squares into melted chocolate to coat.  Place on wax paper to put back in the fridge to set.  Keep chocolates in an airtight container in the refrigerator.

Friday, December 17, 2010

Christmas Ribbon Decor

I saw this cute Christmas Decor item today while browsing and it looked so easy and so cute. Its made of styrofoam balls and ribbon... You could use bright fun colors or make it a little more elegant and classy too. An easy and cheap darling decor item!


Wednesday, December 15, 2010

Monster Bash Part 1

For those of you who follow my personal blog, you probable already saw most of this Monster stuff... But I thought I would do a little blip on here and maybe so a little more detail into some of the crafts I did to get ready for the party.  It was my little Monsters 1st Birthday party this last weekend, and it was quite the Monster Bash!

It was a lot of work getting ready for it, I had fun doing it but I dont know if I will ever do anything like it again...
And for any of you that want to have a Monster Bash of your own, I will try to post links and blogs where I got some of my ideas!

First, the Monster Balls


I found this original idea at Sweet Craft Cakes.

I took 4inch Styrofoam balls and painted them with acrylic paint.
Cut felt into triangles (cut into strips and then zigzag into triangles), start at the bottom and work around in layers. Hot glue the triangles on and then then hard part, coming up with the cute faces!

Tuesday, December 14, 2010

Kids Crafts

While scrimmaging around through some of my favorite blogs i can across a new one that made me super excited! It actually made my heart pitter patter a little bit!

One of my favorite blogs to follow is UCreate, but did you know there was a UCreate with Kids...

It has the cutest crafts!  I cant wait to do some with my little monster!

I hope you all will be as excited as I was and enjoy all the fun things they have to offer.
Thursday, December 9, 2010

Reindeer Feed

Ingredients
6 cups Rice Chex® or Chocolate Chex® cereal
1 bag (12 oz) white vanilla baking chips (2 cups)
1/3 cup coarsely crushed peppermint candy canes (14 miniature, unwrapped)


Reindeer Feed


Directions
1. Line cookie sheet with foil or waxed paper. Place cereal in large bowl.
2. In microwavable bowl, microwave white vanilla baking chips uncovered on High about 1 minute 30 seconds, stirring every 30 seconds, until chips can be stirred smooth. Stir in half the crushed peppermint candy.

3. Pour over cereal; toss to evenly coat. Spread mixture in single layer on cookie sheet. Immediately sprinkle with remaining candy. Let stand until set, about 20 minutes. Gently break up coated cereal. Store in airtight container.

Tip: To make feed bag, cut two 6 1/2 x 5-inch rectangles from a piece of muslin-type fabric. Using a hot glue gun, run a bead of glue on edge of three sides of one rectangle. Top with other rectangle to form pocket. Turn pocket inside-out. Roll down top opened edge to create a cuff.

Check out more fun kid-friendly recipes at BettyCrocker.com

Tuesday, November 30, 2010

CHILI'S CHICKEN ENCHILADA SOUP


Servings:

Ingredients:

Garnish

Pico de Gallo

Directions:

Prep Time: 10 mins
Total Time: 1 1/4 hr
Source: Lil Luna
  1. Add 1 tablespoon of oil to a large pot over medium heat.
  2. Add chicken breasts to pot and brown for 4-5 minutes per side.
  3. Set chicken aside.
  4. Add onions and garlic to pot and sauté over medium heat for about 2 minutes, or until onions begin to become translucent.
  5. Add chicken broth.
  6. Combine masa harina with 2 cups of water in a medium bowl and whisk until blended.
  7. Add masa mixture to pot with onions, garlic and broth.
  8. Add remaining water, enchilada sauce, cheese and spices to pot and bring mixture to a boil.
  9. Shred the chicken into small, bite-size pieces and add it to the pot.
  10. Reduce heat and simmer soup for 30-40 minutes or until thick.
  11. Serve soup in cups or bowls, and garnish with shredded cheddar cheese, crumbled corn tortilla chips, and pico de gallo.


CHILI'S CHICKEN ENCHILADA SOUP

Tuesday, November 23, 2010

Kids Thanksgiving Crafts


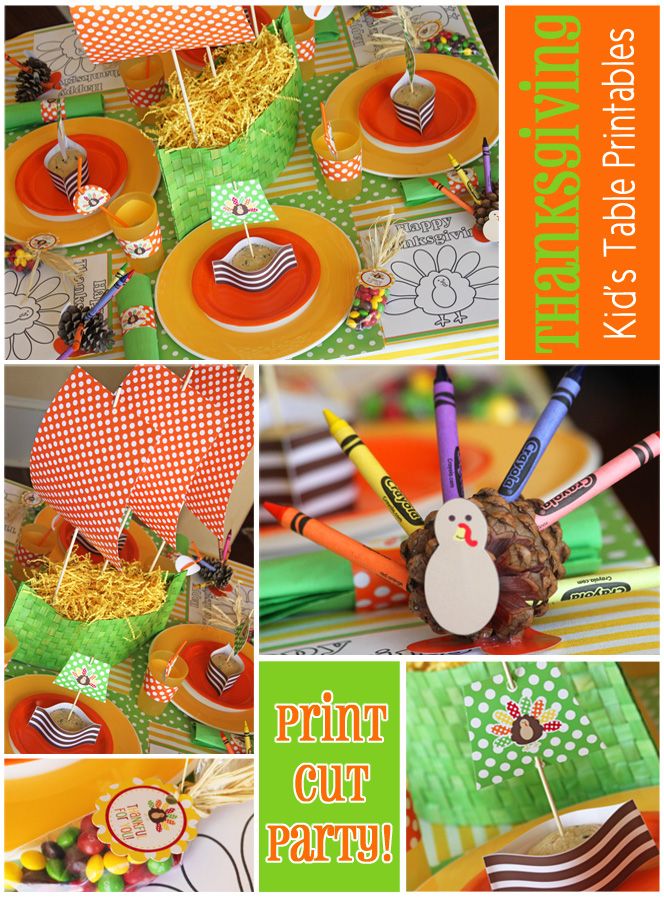
These 4 Cute ideas came from The Busy Budgeting Mama. There a lot more fun ideas there including table decorations, treat bags and fun recipes!


These cute activities and free printables can be found at It's Always a Party at the Parker's
Photobucket

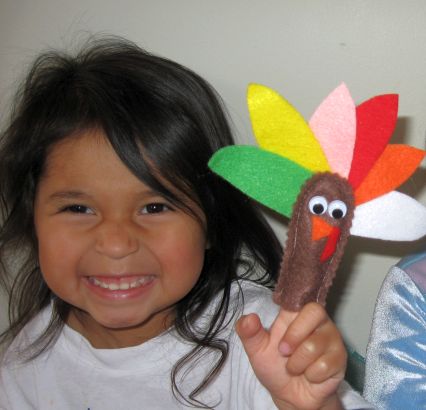
These Darling Finger Puppets were made by skip to my lou


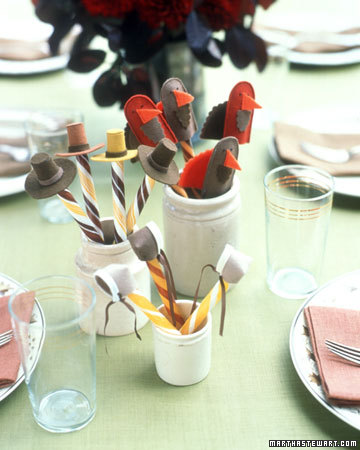
And always when looking for fun crafts, Martha Stewart will never let you down, here are a few of the fun things she has come up with...


Thanksgiving Printables

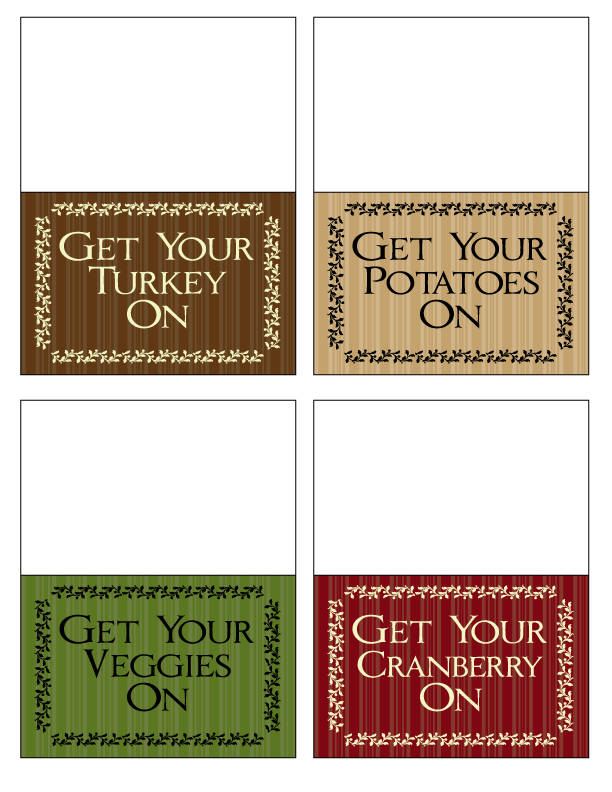
Fun food tags for Thanksgiving meal; found at flamingo toes plus there are many more of the traditional items that you may have, use one, some or all!


This darling Thanksgiving Subway Art is available as a free printable from While He Was Napping


This is darling too! Its on burlap and they just had their home printer print right onto it. The instructions and printable is here


These Thankful cards were found at The Craft Nest


So So So Cute... Thanksgiving notes to put in lunch sacks and surprise your loved ones with! Found at crafts and sutch


This cute Decor is a free printable at These Creative Juices

Image and video hosting by TinyPic


Kids fun table crafts... FREE. Found at It's always a party at the Parker's
Photobucket


These Love Notes are a little cheesy, but quite cute! They were found at Glitter Magic


These ones aren't free, but they are way too cute not to share, found at The Busy Budgeting Mama


Studio 5 has also had quite a few cute Thanksgiving activities/decor lately... I will post a few here but always check out their site for super cute things!

Also check out the video at their site for many more Thanksgiving items!

While working on this post I found a similar post of 10 free downloads over at skip to my lou, there are some of the same posts that I already have on here but lots more really cute ones!

Cute Christmas Printable

This darling Christmas Printable will help bring the true meaning of Christmas into your home this season!


Source: Between Sippycup Refills

Monday, November 22, 2010

Christmas Wreath


Johnny in a Dress made this cute wreath! I think it is absolutely darling. I cant wait for Christmas and getting all decorated and ready for it!

Friday, November 19, 2010

Bacon Cheese Pull Aparts


INGREDIENTS:
  • 1 egg
  • 2 Tablespoons milk
  • 1 (16.3 oz.) can Pillsbury® flaky refrigerated biscuits
  • 4-6 slices crispy bacon, cooked and broken into 1/2-inch pieces (or you can use 4-6 Tablespoons packaged real bacon pieces)
  • 1 cup shredded cheddar cheese
  • 1/4-1/3 cup finely chopped green onions (4-5 medium), using both the green and white parts of the onion
  • 1 (4-ounce) can mushroom pieces (optional)
  • cooking spray
Preheat oven to 35o degrees. Spray an 11×7″ or 12×8″ (2-quart) glass baking dish with cooking spray (if you don’t having either of those size pans, you could probably use a 9×13″ pan–it just may turn out a little flatter). In large bowl, beat egg and milk with wire whisk until smooth. Separate biscuit dough into 8 biscuits and cut each biscuit into quarters. Gently stir the biscuit pieces into egg mixture to coat evenly, then fold in bacon, cheese, onions, and mushrooms, if desired. Spoon the mixture into your sprayed baking pan and arrange biscuit pieces in a single layer. Bake 23-28 minutes or until golden brown. Serve warm by cutting into squares, or just pulling biscuits apart. Makes about 8 servings.

Source: NancyCreative
Original Source Food.com

Thursday, November 18, 2010

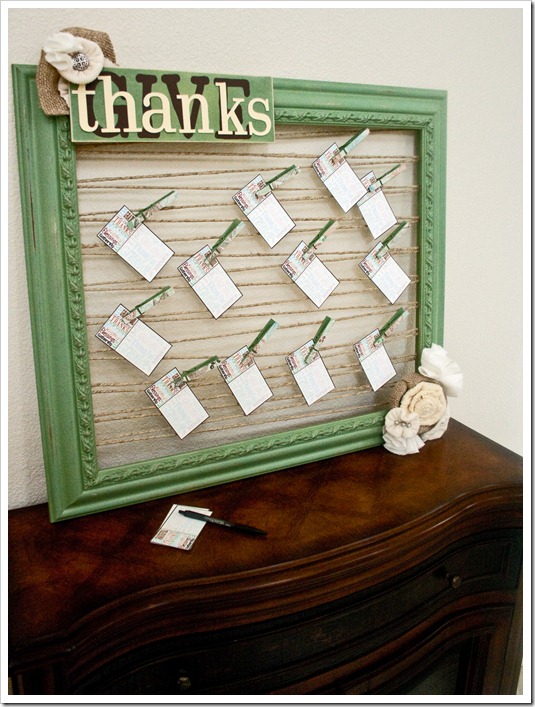
Give Thanks display board

WB 129

I love this darling Give Thanks board! It is such a great idea if your having a large family gathering. Its a great and cute place for you all to express what your thankful for and for everyone to see and enjoy!

It was made by Whipperberry

Tuitorial is located at Tatertots and Jello

Wednesday, November 17, 2010

Give Thanks Banner!

I found this super cute Thanksgiving Banner on At Second Street that is a free download. You cant beat that!


Follow this link to find the download!

Monday, November 8, 2010

Arm/Leg Warmers


These cute things were done on Studio 5 (which is my favorite show ever) They look pretty simple to make and I cant wait to make them one day. There is a full step by step tutorial at the above link.

Saturday, November 6, 2010

Chalkboard Bubbles

I saw this cute idea awhile ago on a blog that I cant remember, and completely forgot about it since.
But when I was watching Studio 5 the other day I was so excited to be reminded of this cute idea. The idea i loved was for first day of school pictures, but it would even be cute for birthday pics, to write the age and even the month for the little tykes.

Source:  no biggie

Friday, November 5, 2010

Cinnamon Bun Popcorn


Cinnamon Caramel Corn with Pecans & White Chocolate 
Recipe by Our Best Bites

12 C popped popcorn (about 1/2 C kernels)
1 C pecan halves, roughly chopped
1 C brown sugar
3/4 t cinnamon
1/4 C karo syrup (or honey makes a good substitution)
1 stick real butter (1/2 C)
1t vanilla
1/2 t baking soda

3 squares almond bark (about 4 oz)

Preheat oven to 250 degrees

Place popcorn and chopped pecans in a large bowl and set aside. 

Combine brown sugar and cinnamon in a 2 liter capacity microwave safe bowl.  Mix well.  Chop butter into chunks and place on top of sugar mixture.  Pour corn syrup over the top of everything.  Microwave on high for 30 seconds and then stir to combine.  Return to microwave and heat for 2 minutes.  Remove and stir and then microwave for 2 minutes more. 

Remove from microwave and add in vanilla and baking soda.  Stir to combine.  Mixture will foam and rise.  Pour caramel mixture over popcorn and pecans and stir very well so everything is well coated.  

Spread popcorn mixture onto a foil-lined jelly roll pan.  Place in oven and bake for 30 minutes, stirring every 10 minutes.  

Remove from oven and spread out on a large piece of parchment, waxed paper, or foil. 

Melt almond bark according to package instructions.  Drizzle over popcorn mixture.  When almond bark is hardened and popcorn is cool, break into chunks and enjoy!


Original Source: Wingledings

Thursday, November 4, 2010

Masterpiece Display


Very Cute Idea for a toy room or any room for that matter! I think its so adorable!


Supplies needed:

1x8 pine boards
Spray paint
Sandpaper
Large paper clips (found mine @ Walmart; $1.88 for 2)
Wood glue
Picture hangers
 
 
The step by step instructions can be found here!

Wednesday, November 3, 2010

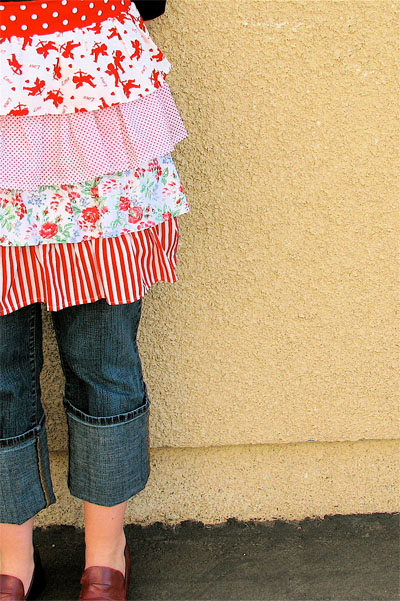
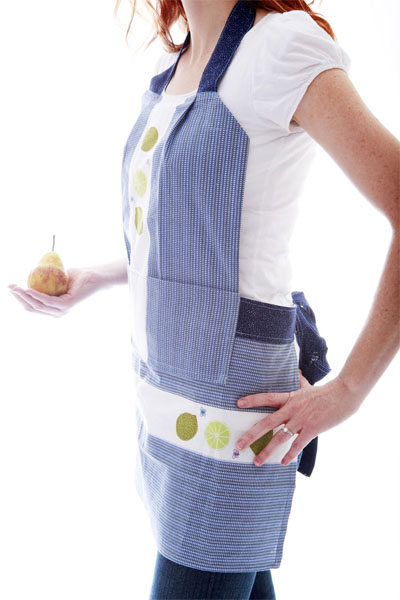
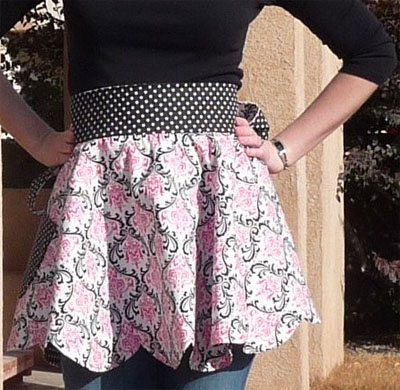
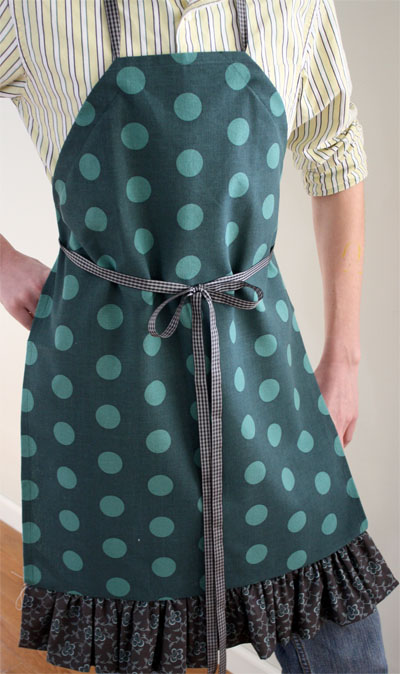
Aprons Galore!

I found this fun post on one of my favorite blogs, skip to my lou, that has multiple apron patterns, they would be fun to make for Christmas gifts, neighbor gifts, or just for yourself.  Check out this site and find the pattern that you like best!

Here are just a few of the cute examples!

Monday, November 1, 2010

Cookie Dough Truffles

Cookie Dough Truffles
  • 8 tbsp. unsalted butter, at room temperature
  • ¾ cup light brown sugar, packed
  • 2¼ cup all-purpose flour
  • 1 (14 oz.) can sweetened condensed milk
  • 1 tsp. vanilla extract
  • ½ cup mini semisweet chocolate chips
  • 1½ lb. semisweet (or bittersweet) chocolate, coarsely chopped
  • Mini chocolate chips (for garnish)
Combine the butter and sugar in a mixing bowl and cream on medium-high speed until light and fluffy, about 2 minutes. Beat in the flour, sweetened condensed milk and vanilla until incorporated and smooth. Stir in the chocolate chips. Cover with plastic wrap and refrigerate until the mixture has firmed up enough to form balls. Shape the chilled cookie dough mixture into 1-1½ inch balls. Place on a baking sheet lined with wax paper. Cover loosely, transfer the pan to the freezer and chill for 1-2 hours.
When ready to dip the truffles, melt the chopped chocolate in a heatproof bowl set over a pot of simmering water. Dip each chilled truffle, one at a time, coating in chocolate and shaking gently to remove the excess. (If at any point during dipping, the cookie dough balls become too soft, return to the freezer to chill for 30 minutes.) Transfer to a wax-paper lined surface. If using mini chocolate chips for garnish, sprinkle on top quickly after dipping each truffle before the chocolate sets. Once all the truffles have been dipped, store them in the refrigerator until ready to serve.

Friday, October 29, 2010

Oatmeal Cream Pies


Oatmeal Cream Pies
Cookies
1 c. butter
3/4 c. dk. brown sugar
1/2 c. sugar
1 tbsp. molasses
1 tsp. vanilla
2 eggs
1 1/2 c. flour
1/2 tsp. salt
1 tsp. baking soda
1/8 tsp. cinnamon
1 1/2 c. quick oats

Cream butter, sugars, molasses, vanilla, and eggs. Combine flour, salt, soda, and cinnamon. Add to creamed mixture. Mix well. Mix in oats and drop by tsp. on cooking sheets. Bake at 350* for 10-12 minutes. Don't overbake.

While the cookies are cooling, make frosting.

Filling
2 tsp. hot water
1/4 tsp. salt
1 (7 oz. ) marshmallow creme
1/2 c. shortening
2/3 c. powdered sugar
1/2 tsp. vanilla

Dissolve salt in hot water and let cool. Combine marshmallow creme, shortening, sugar, and vanilla until fluffy. Add salt water and mix well.

Spread filling on cookie and top with another cookie.
Try not to eat all of them:-)

Thursday, October 28, 2010

Apple Brickle Dip


Source: lil luna
Apple Brickle Dip
1 (8oz.) package cream cheese
1/2 cup brown sugar
1/4 cup sugar
1 tsp. vanilla
1package (7 1/2 oz.) brickle chips or english toffee bits

Mix all together & keep refrigerated until ready.
It's that easy!

Wednesday, October 27, 2010

CHICKEN CORDON BLEU BREAD BOWL


Source: Mindika Moments

CHICKEN CORDON BLEU BREAD BOWL
(Recipe adapted from Cuisine at Home)
For the Chicken:
4 T. butter
16 oz. boneless, skinless chicken breast cubed (about 3 chicken breasts)
1/2 C. minced shallots (or onion)
2 T. flour
1 C. apple juice
1 1/4 C. chicken broth
1/2 C. heavy cream
1/4 C. grated Parmesan
2 T. mustard
1 t. thyme
2 C. broccoli florets, blanched
salt and cayenne pepper to taste

For the Casserole:
4 round sourdough loaves (or medium bread bowls)
4-8 thin slices smoked ham
4 large slices Swiss cheese
4 t. grated Parmesan, divided

1. Preheat the oven to 400 degrees. Coat a small baking sheet with non-stick cooking spray.
2. Melt the butter over medium-high heat in a saute pan. Add the chicken and saute until it starts to brown, about 5 minutes.
3. Stir in the shallots and saute until softened, about 2 minutes. Sprinkle mixture with flour, stir to incorporate.
4. Combine the apple juice and broth; slowly add, stirring constantly to avoid clumping.
5. Stir in cream, Parmesan, mustard and thyme; simmer after each addition until the sauce is thickened, about 5 minutes. Add broccoli; season with salt and cayenne. Reduce heat to low.
6. Hollow out the loaves by cutting off the tops and tearing out the insides. (Remove as much bread as possible.) Compress any remaining bread inside the loaves to make room for the filling. Toast loaves directly on oven rack, about 5 minutes; remove to prepared baking sheet.
7. Arrange the ham slices in the bottom of each loaf. Using a slotted spoon, divide chicken mixture evenly between loaves, reserving sauce in the pan.
8. Top the chicken in each loaf with a slice of Swiss and sprinkle with 1 t. Parmesan.
9. Bake the bread bowls until the cheese melts, about 10-15 minutes. Serve each bread bowl with reserved cream sauce.
10. Makes 4 bowls.

Tuesday, October 26, 2010

CHOCOLATE CUPCAKES AND PEANUT BUTTER ICING


CHOCOLATE CUPCAKES AND PEANUT BUTTER ICING
Ingredients
• 12 tablespoons (1 1/2 sticks) unsalted butter, at room temperature
• 2/3 cup granulated sugar
• 2/3 cup light brown sugar, packed
• 2 extra-large eggs, at room temperature
• 2 teaspoons pure vanilla extract
• 1 cup buttermilk, shaken, at room temperature
• 1/2 cup sour cream, at room temperature
• 2 tablespoons brewed coffee
• 1 3/4 cups all-purpose flour
• 1 cup good cocoa powder
• 1 1/2 teaspoons baking soda
• 1/2 teaspoon kosher salt
• Kathleen's Peanut Butter Icing, recipe follows
• Chopped salted peanuts, to decorate, optional

Directions
Preheat the oven to 350 degrees F. Line cupcake pans with paper liners.

In the bowl of an electric mixer fitted with a paddle attachment, cream the butter and 2 sugars on high speed until light and fluffy, approximately 5 minutes. Lower the speed to medium, add the eggs 1 at a time, then add the vanilla and mix well. In a separate bowl, whisk together the buttermilk, sour cream, and coffee. In another bowl, sift together the flour, cocoa, baking soda, and salt. On low speed, add the buttermilk mixture and the flour mixture alternately in thirds to the mixer bowl, beginning with the buttermilk mixture and ending with the flour mixture. Mix only until blended. Fold the batter with a rubber spatula to be sure it's completely blended.

Divide the batter among the cupcake pans (1 rounded standard ice cream scoop per cup is the right amount). Bake in the middle of the oven for 20 to 25 minutes, until a toothpick comes out clean. Cool for 10 minutes, remove from the pans, and allow to cool completely before frosting.

Frost each cupcake with Peanut Butter Icing and sprinkle with chopped peanuts, if desired.

Kathleen's Peanut Butter Icing:
• 1 cup confectioners' sugar
• 1 cup creamy peanut butter
• 5 tablespoons unsalted butter, at room temperature
• 3/4 teaspoon pure vanilla extract
• 1/4 teaspoon kosher salt
• 1/3 cup heavy cream

Place the confectioners' sugar, peanut butter, butter, vanilla, and salt in the bowl of an electric mixer fitted with a paddle attachment. Mix on medium-low speed until creamy, scraping down the bowl with a rubber spatula as you work. Add the cream and beat on high speed until the mixture is light and smooth.
2006, Barefoot Contessa at Home, All Rights Reserved

Monday, October 25, 2010

Apple Nachos

These are a perfect snack for Fall!


Apple Nachos
  • Sliced apples
  • Caramel topping, warmed slightly to make it thinner
  • mini chocolate chips
  • marshmallows, nuts, raisins, etc (optional)
Place apples on a plate or platter, top with chocolate chips, and any other toppings you choose. Drizzle caramel topping all over.
Enjoy!
Source: lynns kitchen adventures

Sunday, October 24, 2010

Upcycled Boy Hats


The link above has the step by step directions to make these adorable hats!

I love them and cant wait to make some!